Week 1 diary
This week I created a guitar Hiphop beat and added some vocals off youtube from the rapper Juice wrld. For a while now i’ve wanted to create that reverse vocal swell that a lot of recent songs have as i thought i would go well with the rise at the start of the drop. I went on Youtube and found a video by a Youtuber named ‘Soniq Sounds’ called “Reverse Vocal Effect Swell in Logic Pro X”. I started by repeating the first phrase which was ‘the’ four times right before the drop. Then I bounced the four into one audio track and added a fade with the fade tool. Then i took the first part of the audio and copied it into a new track. Next I added space reverb and turned the wet to 100 percent and dry all the way down to 0. After that I bounce down the audio and reversed it to get that rise sound. That layered with the Four that i’d added created that final swell effect that i was looking for. Im going to try and incorporate this technique into my original recorded audio. I’ve got a couple people i’ve met through my Music instagram who also make this kind of genre and we’re planning on working together fairly soon. I’ve also been talking to a singer/rapper from theUS who’s willing to sing over my track, so i can add that effect in once thats come together.
My Track:
Week 2:
This week i created a Pop/EDM style track inspired by the chainsmokers. I wanted to create a specific plucky marimba synth commonly used in these genres. I looked on youtube and found a video by youtuber Tony Holiday on how to make this exact synth. He did a step by step walk through on alchemy from a blank synth.
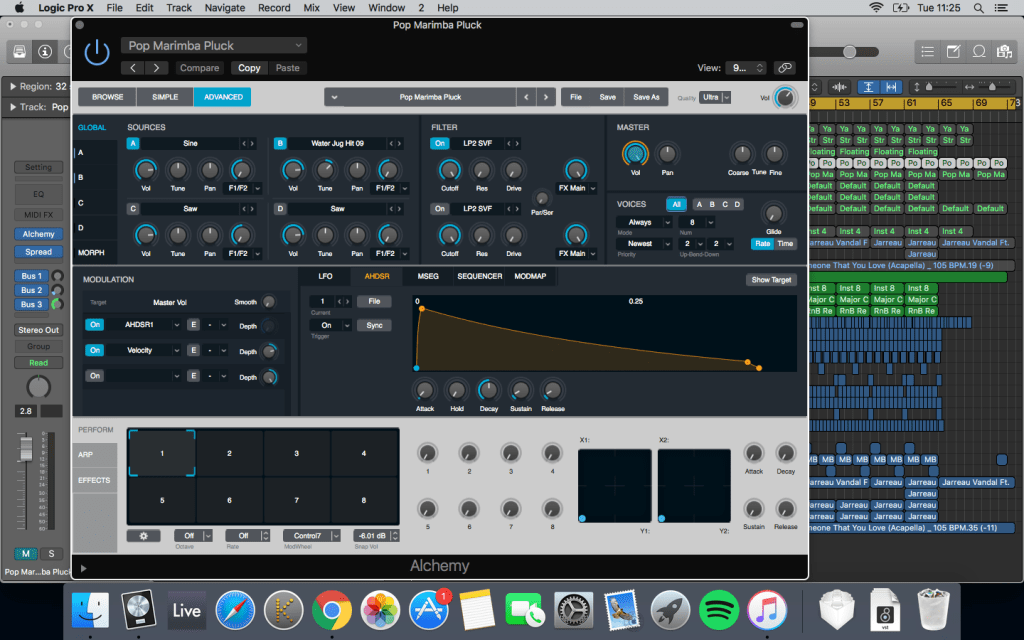
I built the synth in alchemy from scratch. First i changed the quality to ultra to make the best possible sound. Then I went over to the oscillator A tab and changed it from saw to sine. Then switched over to the oscillator B and turned it on. Then went into the drop down and imported water jug hit 9. This gave it that marimba sound i was looking for. I then changed the analysis mode to sampler and changed mapping to pitch. After that, I changed oscillator B to mono and turned up then position knob to 8.2 percent to determine the playback start position. Then I turned up the coarse tune knob up 15 semi tones. I then changed the AHDSR modular panel button to actually create the pluck shape. I turned up the attack, turned down the hold, pushed the decay up to 0.37, sustain to 10.1 percent and release to 0.013. Still in oscillator B, I went up to the filter and turned it on and turned the cutoff down a little to take the high frequencies out. I then came out of alchemy and went into the channel strip and added stereo spread. I turned the low intensity slider to 26 percent, the low frequency down to 180Hz and the upper frequency up to 18700Hz. I then added a bus and added an expander to that and added the preset “crisp up” and turned the gain down. I then added chorus to the bus and turned the intensity up to 100 percent and mix to 20. I added stereo delay and under global we went to routing and changed it to ping pong L. On both delays I brought the low cut up to 200Hz and changed the output mixes to 20 percent each. Finally, I added space designer and added space reverb to give it more texture. This gave me the perfect sound I was looking for and i added it into my track. One thing I could work on is the mixing, right now the bass is over shadowing some of the other instruments.
My Track:
I wanted to add vocals to the song to finish it off. I went on Youtube and found an acapella with the same bpm and fitted it in time with my track. The acapella wasn’t in the same key as the song so originally i changed the vocals with pitch shifter to fit the key. This made the vocals grainy and crackly and on top of that it made to vocals sound too high pitch and not at all how i wanted it to sound. I looked on Youtube to find a way to change the pitch of the vocals without making it crackly or speed up or slow down the vocals. I found a video by a Youtuber named Sypher’s Sounds who explained how to transpose the vocals. Firstly I selected the vocals and clicked the Flex Button located just below the record button. This then gave me the option to change the algorithms to alter the timing and pitch of the midi. Sypher suggested i use the polyphonic setting as he believe’s this is the best setting for vocals. I then clicked the region inspector and down to the transpose value. Finally i adjusted the value down two to fit the correct pitch. Overall this was a much better option as it didn’t make the vocals sound like a chipmunk and didn’t change the speed. I eventually decided to bounce down the whole track and transpose it to a different key. I think the end result was much better.
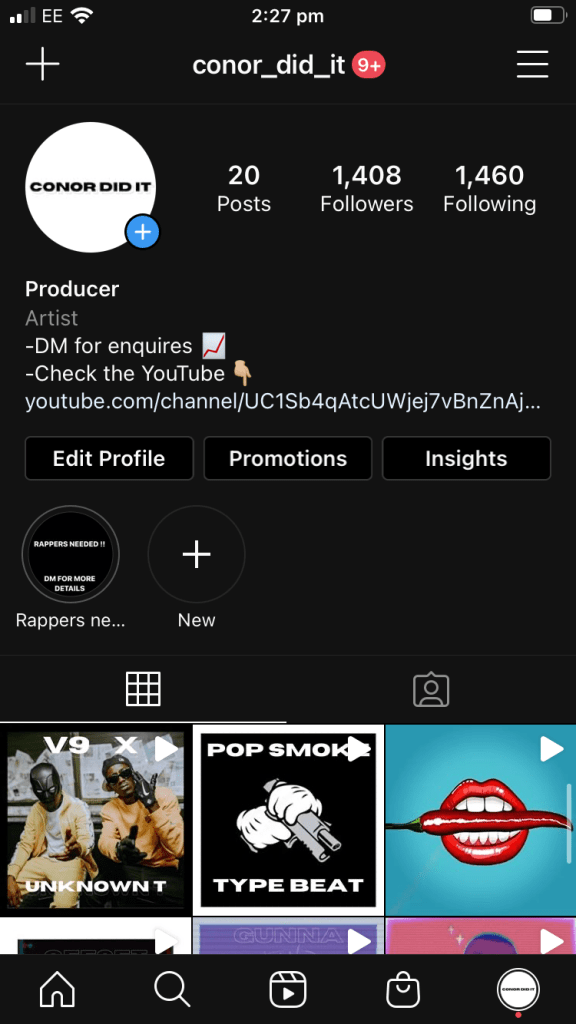
I’ve been working hard on my Instagram. Although I only have 20 post, i’ve got over 1400 followers and everage 250 – 500 views on a post. Im in multiple group chats with other artists and producers, all helping each other boost our views and following with shout outs and sharing our posts around. Also promoting our other streaming plat froms like youtube, Soundcloud and spotify, etc.
Week 3:
This week i recorded some guitar onto a track at home. I have a fairly decent microphone but the guitar just wasn’t sounding the way i wanted it to. I haven’t got much knowledge on mixing guitars so i went on Youtube to see the best way to mix acoustic guitar. I found a video by a Youtuber/ Professional Producer named Jacob Restituto called ‘How to make an acoustic guitar sound wider’. I thought i’d start there. He said the way he does it is add sample delay (Mono > Stereo) and turn up the delay knob to about 800 samples. At (1:01) he explains that what this essentially does is split the mono signal and turns it into a stereo signal by delaying the right side by 800 samples.
I also watched a video by a Youtuber named Jay Crafton called How to mix acoustic guitar with stock plugins. I first started by adding EQ to each section of the piece, taking out any buzzing and removing unwanted frequencies from the low end and all round making it sound more crisp. I also added the Sample delay like i’ve said previously. After I added the Classic VCA compressor as it has an automatic attack and release setting and it makes it really punchy. My levels where all ready pretty good so I just left it as it was. Finally I added some Dual mono Silververb to give it more space and fullness and i put that through a bus, turning up the send level knob just over half way and the wet up to 30 percent and dry down to 70.
The video I used for research:
My Track:
Week 4:
This week i created a track inspired by tame impalas’, “Lost In Yesterday”. What specifically i liked about it was the drum pattern. I wanted to recreate that drum pattern into my own song with live drums. So i recorded a basic drum pattern and some one shots in the studio. Tame incorporates Live music and electronic together so to recreate the beat i made it solely out of one shots so i could work on each section of the kit . I then bounced down the beat i made into a 4 bar section of each part of the kit e.g a 4 bar loop of the Hi Hats and then dropped them onto my track. I recorded some electric guitar into the sound as well, but i kept hearing pops and clicks at the start and end of each loop. I went on youtube and found a video by a Youtuber called ‘DNNY O’ who explains that the clicks are a “Discontinuity in the wave form. An immediate jump in the waveform, in a non continuous line”. This meant i’d have to zoom deep into the file and correct it so that its a continuous waveform. I did this by first joining the two loops together to create a new audio file. Then, using the zoom tool, I found the discontinuity where the two loops joined. I then used the pencil tool to follow the waveform pattern and connect both loops together, and that fixed the pops.
My Track:
Week 5:
This week i created a Drill track inspired by V9 and Unknown T, two drill artists. I wanted to add a choir sample as i thought that would make my track sound darker and more unique. Unfortunately the laptop i work on is too old to get the newest version of logic, so i was unable to use the quick sampler to sample and edit the audio file. So instead i downloaded blackhole so i could record it straight of Youtube into logic. I then transposed it to fit the right key of the track. Another technique I explored was the use of the fade tool. I wanted to find that slow, dropping effect used commonly in drill. So i went on youtube and it came up with videos on how to use the fade tool. I found a video by a Youtube called ‘Logic Pro X Tutorials’ who explained very simply that all you needed to do was select the fade tool from the tool menu find the audio file you want to fade out, draw in the length of the fade, then press control and right click to either speed up or speed down. I used this technique in my track on both my choir samples.
My Track:
Week 6:
This week i created a Uk garage/ House type beat inspired by AJ Tracey’s “West Ten” Featuring Mabel. There was a specific gritty UK Garage bass I wanted to create, so i went on to Youtube and found a video called “creating a warp bass for Garage” by a YouTuber named P-TORIALS. Using the Es2, i recreated this bass from scratch. First I went into tutorial settings and picked analog saw init. Then changed oscillator 1 to sine wave, 2 to ring modulator and moved the pad so it played both oscillators. Detuned down by 12 semitones, and switched off all cut off and added some fatness. I assigned the first two modulation target pop up menus to cut of 1-2 and changed both modulation source pop up menus to envelope 2 and turned both intensity sliders up. I then brought up the attack to get that growing sound on envelope 2. I then brought up the frequency modulator on oscillator 1. That created the sound i’d been looking for and i added it to my track.
My Track:
Week 7:
This week I found an old track me and another student, Archie created last year inspired by the Gorillaz and their song “Clint Eastwood”. I really liked making this song and we’d recorded vocals but i wasn’t happy with the way they sounded as I wanted to recreate that megaphone sound they use. So I went on Youtube and found a video by a creator I really like called Crab Lord called ‘Distorted Vocal Effect in Logic Pro X’. I didn’t want to add pitch correction and delay like he did as i didn’t think it matched the style of music. Instead I first added the preset ‘Megaphone’ from the Channel EQ which took out loads of the Low and high frequencies so it sounded compressed and more like a megaphone. Then i added a Studio VCA compressor, making sure auto gain was off and that there was no distortion. Changing the Ratio to 3.1, the threshold to -41.5 and changed to makeup to 5 as I had taken away 10. I then changed to attack to 95 and release to 210. This made sure there was no clipping and that my audio wasn’t too loud. Then I added a noise gate to take away any background noise in between stops. All I did was go into the presset “Tighten Up” and turned the threshold down to -35. Next, I added a preset from the pedalboard called “Big Bad Bass” this is what was going to give me that distorted ‘Megaphone’ type sound. I changed the drive of the octave pedal down to 78 so that it wouldn’t clip or be too loud. Then i moved on to the Grit pedal, this is the one that gives the vocals the distortion, but i turned down some of that distortion to 22db as it was a bit too much in the preset. I also changed the filter to 15000 Hz to get a cleaner distortion. Finally, I added space reverb to give it room and fullness, I chose to preset from large spaces – plate reverbs and chose ‘Shimmering plate’ and turned down the wet to -18 and dry to o. This gave me the Gorillaz style ‘Megaphone’ vocals i wanted.
My Track:
